Discover the decadence and danger of 1980's Japan as you fight like hell through its neon-lit entertainment districts in the definitive edition of the action-adventure crime drama that created yakuza legends.
Chapter-aligned list of substories, trophies, and choices to pick up while progressing.
CH 2The Real Estate Broker
MISSABLE
'Rich Taste' — Gold Champagne to the homeless man
Before Chapter 2 ends
Buy Gold Champagne (¥20,000) from Don Quijote and hand it to the homeless man on a Kamurocho street. Roll into Chapter 3 and the trophy is permanently locked. Pull ¥20,000 from Real Estate Royale or a Mr. Shakedown win first if cash is tight.
CH 3A Gilded Cage
MISSABLE
'Smooth Criminal' — Odyssey recon
Majima — Chapter 3
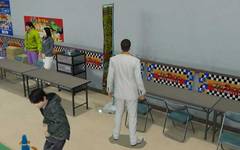
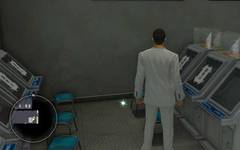
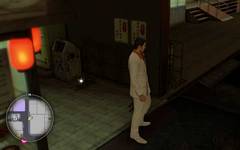
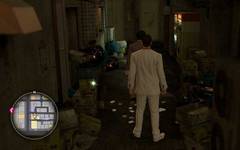
Talk to the green-jacket man on Bishamon Bridge, the green-jacket woman southeast of Le Marche, and the suited group south of Odyssey. Inside, in the first-person view, look at the three tables on the far side and the table immediately to the left — not Mr. Libido. Move past Ch.3 and it's gone.
CH 5An Honest Living
MISSABLE
'Business Etiquette 101' — Café Alps meeting
During the client meeting with Oda
At Café Alps choose 'Near the back' → 'Nearest chair' → 'Nothing', then nail the QTE when Yamanoi enters. Any wrong pick and the trophy locks when Chapter 5 ends.
CH 7A Dark Escape
MISSABLE
'Best Served Cold?' — let the takoyaki go cold
Majima — Ch.7 errand
Buy takoyaki at Magutako, then waste 15+ real-time minutes on substories or minigames before delivering it to Makoto. The inventory icon changes when it's cold. Advance the chapter without doing this and it's gone.
CH 10A Man's Worth
MISSABLE
'It Takes Two' — three co-op heat actions with Oda/Tachibana
Tojo HQ assault
When Oda or Tachibana grabs an enemy, close in and press Triangle for the co-op heat action. You need three. They grab infrequently, so stock heat-restoring items. No way back after Ch.10.
CH 12Den of Desires
MISSABLE
'They Won't Mind' — two safes at Benten Inn 2F
Pushing through Benten Inn
After the fan-dual-wielding enemy and before the second staircase, duck into the room on the right — two white safes sit in the back-left corner. Smash both before going upstairs or it's locked.
CH 13Bloody Battle Royale
MISSABLE
'Big Hair in the Crosshairs' — drop the afro yakuza
Mid-way through the car chase
Just before the machine-gun van, a white-suited afro mook leans out briefly. Trigger Heat Eye to slow time and shoot him. Miss the window and the trophy locks at chapter end.
CH 15Bound by Oath
MISSABLE
'Hitting the Bottle' — intentionally fail Reina's bottle QTE
Majima vs Nishikiyama at Serena
When Nishikiyama tosses you toward the counter, Reina swings a wine bottle in a QTE. Deliberately let it land — wrong button or no input. Block successfully and the trophy is gone for good.
Substories
100 entries
100 substories total — Kiryu's Kamurocho + Majima's Sotenbori. Completion unlocks the 'Two Dragons' trophy line plus side ability boosts (Club SEGA, Pocket Circuit, Cabaret). Substories gate on chapters, so run them alongside the main story.
Kiryu67
#01The Visionary Fortune-teller
▼
Kamurocho — street ? icon
Trigger: After buying the white suit in Chapter 5, after completing Majima's substory 51
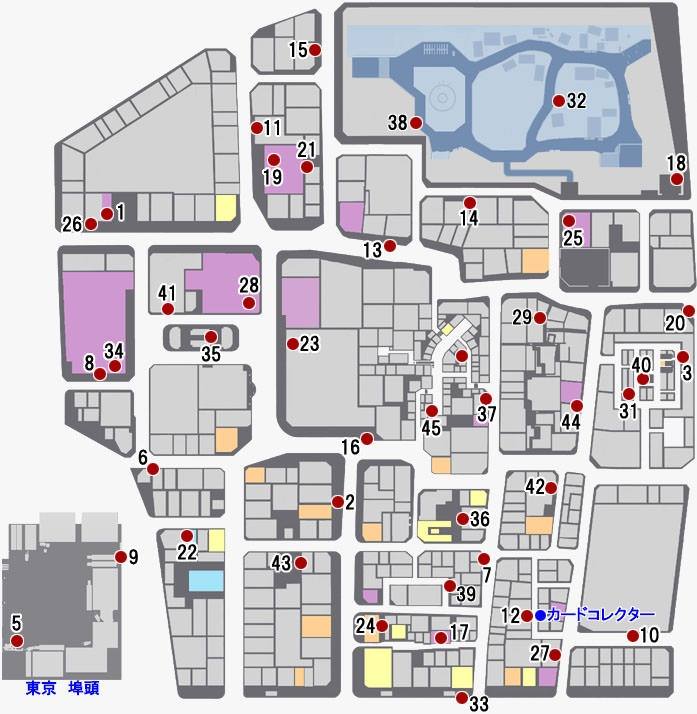
Walking through Senryo Avenue, you overhear two women gossiping about a fortune-teller who is supposedly 100% accurate, triggering the substory. Head to [Map 2] to find the fortune-teller in a black robe. She warns that someone is about to attack and asks Kiryu to act as her bodyguard. Defeat the thugs who show up. Afterward, you're given a choice to have your fortune told or leave — you must choose to have it told to complete the substory. The readings are about the stories of Yakuza 1–5; right or wrong answers don't affect completion. Choosing wrong answers just gets you a disappointed reaction and a rock music explanation. View all three readings to complete the substory.
■ Choices:
1) About the future 2) About family 3) About work
(You'll need to pick all three eventually, so choose any order.)
1) Help a friend. 2) Make your friend take responsibility. 3) Solve it with money.
1) 10 billion yen 2) 1 million yen 3) Can't be bought with money
1) A close aide 2) A driver 3) The prime minister
Correct answers: any → 1) → 3) → 2). Wrong answers are fine too.
RewardFortune-teller becomes available for hire
#02Arakure Quest
▼
Kamurocho — street ? icon
Trigger: While returning to Kiryu's apartment in Chapter 2
1) Head to Don Quijote and approach the crowd waiting in line. Talk to the boy at the back of the line to learn what they're waiting for. 2) After talking to him, step inside Don Quijote then come back out. The line is gone; go to the road behind Don Quijote where you'll find a delinquent student and the boy. 3) Head to [Map 3] and defeat the delinquent high-schooler. 4) Head to [Map 4] and defeat the street punk armed with a knife. 5) Head to [Map 5] and defeat the yakuza armed with a pistol. After the battle you obtain the weapon 『Sunlight』.
RewardWeapon: Sunlight
#03Passport to Pizza
▼
Kamurocho — street ? icon
Trigger: After buying the white suit in Chapter 5
1.Head to Champion District and approach the foreign woman (Samantha) who is doubled over in pain. Buy a recovery item 「Staminan X」 from Kotobuki Drugs or similar and give it to her to trigger the substory. Samantha gives you the Accessory 「Hidden Wallet」.
2.Go to Smile Burger at [Map 3] and order a pizza. Buy a Special Mix Pizza (L size) for ¥3,000. A delivery minigame begins — deliver the pizza to Samantha within 1 minute 30 seconds. Bumping into pedestrians costs time, so dodge them. Following the blue route lets you arrive with 13–20 seconds to spare. If you fail, buy another pizza from Smile Burger for ¥3,000 and try again. After handing over the pizza, a fight breaks out with some thugs. Defeat them, and Samantha gives you the Accessory 「Security Wallet」. Substory complete.
Trigger: While returning to Kiryu's apartment in Chapter 2
1.1) Enter Shellac and a cutscene plays. Try to sit at the innermost seat to trigger the substory.
2.2) After talking to the cold-looking man you'll be asked to leave. Move away from Shellac a bit, then go back inside to trigger a new event. Outside, a fight with mafia armed with pistols begins. Defeat them. Substory complete.
RewardWeapon: 9mm Auto Pistol
#05The Human Trafficking Ring
▼
Kamurocho — street ? icon
Trigger: After buying the white suit in Chapter 5, after completing substory 4
1.Enter Shellac on Champion District to trigger a conversation event with Kasuga, starting the substory. The first choice doesn't matter — even if you choose to accompany him, Kasuga will head to the scene alone. Head toward the alley behind Pink Street,
2.toward [Map 2]. You witness Kasuga talking to a suspicious man. Go back into Shellac on Champion District to confirm Kasuga never showed up. Return to where Kasuga was talking and a fight with thugs begins. Win the fight, then an event plays in Shellac to complete the substory.
RewardJournalist Kasuga (Kasuga) becomes available for hire
#06Damned Yanki
▼
Kamurocho — street ? icon
Trigger: While returning to Kiryu's apartment in Chapter 2
Walk northwest of the theater toward the west end of Shichifuku Street and bump into a rough-looking man to start the substory. After the yanki cutscene at [Map 2], talk to the man peeking from behind a pillar. Three greeting choices — the correct order is 2) Yadoyoroshiku, 1) A fight story, 3) Stay silent. Reward after the live show depends on the choice combination.
RewardWild Shirt (correct choices)
Charisma Photo (wrong choices)
Kyo becomes available for hire
#07How to Train Your Dominatrix
▼
Kamurocho — street ? icon
Trigger: After completing substory 6
Starts with a scene in front of Karaoke Snack Heroine where a masochistic man is kneeling before a dominatrix. Talk to Queen Ayu, then defeat 2 street thugs. Three rounds of verbal whipping — the correct order is 2) 3) 1). The wrong route still completes the substory but gives different rewards.
RewardArmor: Animal Hair Waistband (correct choices)
Weapon: Loaded Steel Pole (wrong choices)
Toughness Z (wrong choices)
Image Video '13 Sakurai Ayu' added to stock
Masochist Uncle becomes available for hire
#08Password Protected
▼
Kamurocho — street ? icon
Trigger: While returning to Kiryu's apartment in Chapter 2
1.Approach the two men inside the shopping arcade at [Map 1], then talk to the suspicious shopkeeper. Get the password from the man with a story at [Map 2]. Talk to Mon-mon at [Map 3] then choose either option (either way, fight 4 mafia). Pass the password to Lee Long for the weapon BROKEN M1985; give the wrong one and you fight Lee Long instead. Enter the password 「Subotenuhigeukiro」 on the shop owner's text input to complete.
2.Get the password from the man with a story at [Map 2],
3.then talk to Mon-mon at [Map 3] (either choice triggers a fight with 4 mafia). Pass the password to Lee Long for the weapon BROKEN M1985; wrong password means a fight with Lee Long instead. Enter the password 「Subotenuhigeukiro」 on the shopkeeper's text entry to complete.
RewardWeapon: BROKEN M1985
Can purchase items from the suspicious shopkeeper
Lee Long becomes available for hire
#09The Show Must Go On
▼
Kamurocho — street ? icon
Trigger: While returning to Kiryu's apartment in Chapter 2
Walk through [Map 1] and a film crew asks Kiryu to help with an on-location shoot. Three rounds of choices covering greetings, props, and cooking — the correct combination is 1) 3) 2) for the best reward (Magnetic Necklace). After filming, an event with Producer Iida plays out, followed by a fight with 3 thugs.
RewardAccessory: Magnetic Necklace (correct choices)
Taurine+ (wrong choices)
#10Sugar Daddy
▼
Kamurocho — street ? icon
Trigger: At the start of Chapter 6
Walking through Hotel District, trigger an event with a worried man hiding behind a utility pole. He asks you to check whether a woman inside a shop is really his daughter. Go inside and talk to Reika through a series of dialogue choices. The choices make almost no difference to the reward — just see the scene through to the end to complete.
RewardAccessory: Kishimojin Amulet
Image Video '19 Aiba Reika' added to stock
#11The Shrink-wrapped Dream
▼
Kamurocho — street ? icon
Trigger: Right after Chapter 6 begins
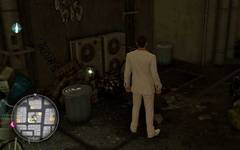
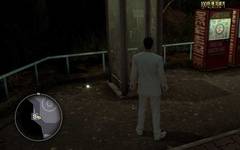
Find the child in the back alley of Tenkaichi Street to start the substory. The kid asks you to buy something from a vending machine. After the event, you must reach the vending machine without being spotted. Getting spotted sends you back to the start. Deliver the 「Shrink-Wrapped Book」 to the boy to complete the substory. Head left from the start, following the western restaurant, and reach the menu sign at [Map A]. Crouching behind the sign lets you avoid being spotted even when the woman looks your way. Marina wanders around the park, so bad luck can still get you caught. Next, a plastic trash can is positioned at [Map B] — advance to it. The key is to move only when moving people are turned away. The camera locks near the wall, but use the right stick to adjust your view toward the vending machine. Then dash to the vending machine when the stationary person turns away.
Reward-
#12Miracle on Tenkaichi Street
▼
Kamurocho — street ? icon
Trigger: After completing substory 9
1) Go to the area with the Dream Machine vending machine at [Map 1] and approach the two nearby men to trigger the substory. 2) You hear that a celebrity is coming from America. Move away a bit, then passing through [Map 2] a man searching for someone will approach you. Accept his request and you'll learn about superstar Miracle. 3) Director Spinning's event plays. After the event, escort Miracle Johnson as he exits Tenkaichi Street to a storefront in Akauomura. Defeat the zombies that attack from all directions — grab a nearby bicycle to take them out more easily. 4) Miracle Johnson reaches his destination. Choose between a large black box and a small white box for your reward. The black box contains the Accessory 「Silence Shoes」; the white box contains the Armor 「Baseball Shirt」. The Baseball Shirt is sold at Don Quijote Kamurocho, so the black box is recommended. Receive the gift to complete the substory.
RewardAccessory: Silence Shoes
Armor: Baseball Shirt
Papillon Kato becomes available for hire
Director Spinning becomes available for hire
#13The Tax Lady
▼
Kamurocho — street ? icon
Trigger: After conquering the Electronic King area in Chapter 5
After conquering the Electronic King area, enter Sugita Building to receive a phone call from a female tax auditor, starting the substory. Step outside and a woman who looks like a tax auditor spots Kiryu and triggers an event. Talk to her — the real tax auditor asks for help with a sting operation; agree. Inside Makuro's office several choices appear, but none cause failure and all lead to the same reward. See the scene through to receive your reward and complete the substory.
■ Choices:
1) Look at her seductively 2) Whisper sweet nothings 3) Try to kiss her
(Any choice is fine. 1 and 2 have Marui lean on Kiryu; 3 has Kiryu lean on Marui.)
You're led to Makuro's office — examine the video cabinet in the corner.
1) The position is off 2) The types of videos are odd 3) The cabinet being here is odd
(Other choices do nothing — you'll keep searching.)
1) The view outside that window 2) Makuro's clothes 3) Marui's movements
(Choices 1 and 3 cause a scene where Marui bumps her head on the cabinet.)
1) A video player? 2) She's a woman 3) Just a house?
(Choices 1 and 2 cause Marui to bump her head.)
1) Read her palm 2) Pretend to sleep 3) Ask for a handshake
(Choices 2 and 3 cause Marui to bump her head.)
Correct answers: any → 3) → 2) → 3) → 1). Wrong answers are fine too.
RewardAdvisor 'Tax Lady Marui' joins your staff
Accessory: Trouble Finder
#14Destiny Calls
▼
Kamurocho — street ? icon
Trigger: Late Chapter 10, while heading to Asia Street / Jinnai Town
1.Talk to the young telephone club clerk north of Pink Street at [Map 1]. Select 「Strange caller」 and proceed with the call (choices don't affect the reward). Then head to West Park,
2.and defeat the suspicious man at [Map 2].
RewardWeapon: Spicy Knife
#15Help Wanted!
▼
Kamurocho — street ? icon
Trigger: After conquering the Leisure King area in Chapter 5
After conquering the Leisure King area, walk through the back alley of the Theater Square and you'll overhear a boss-like man and a man called Aida discussing staff recruitment, triggering the substory. Enter Sugita Building to find secretary Marina struggling with a staff shortage. Kiryu offers to hold job interviews. Step out of Sugita Building and back in, then talk to Marina to start the interviews. Regardless of your answers, completing the interview finishes the substory.
■ Choices:
1) What motivated you to apply? 2) What type of woman do you like? 3) What color underwear are you wearing today?
(Any weird choice is fine.)
1) What's your special skill? 2) Have you ever experienced failure? 3) Will you do anything asked of you?
(All will be selected.)
1) Accepted! 2) Rejected!
(Either is fine. If accepted, the interviewee won't show up the next morning. If rejected, Kiryu figures out the applicant never intended to join.)
Correct answers: 1) → all → any. Wrong answers are fine too.
Reward-
#16Help Wanted! Again...
▼
Kamurocho — street ? icon
Trigger: After completing substory 15
1.After completing substory 15, step out of the office and back in, then talk to secretary Marina to hear there's a new applicant, starting the substory. Just like before, the interview completing is all that's needed to finish the substory, regardless of your answers. ■ Choices:
2.1) Aren't you going to take over the family business?
3.2) What's your best dish?
4.3) What do you mean you're confident in your stamina? (All three will be asked.)
5.1) Ask them to pitch themselves again
6.2) Ask again about not taking over the family business
#17Underneath It All
▼
Kamurocho — street ? icon
Trigger: While returning to Kiryu's apartment in Chapter 2
1) Pass through [Map 1] and see a male student and a female student arguing to trigger the substory. Talk to Tatchan to hear about Mina. 2) Pass through [Map 2] for a cutscene spotting Mina. Talk to her for a choice.
■ Choices:
1) I've never done this before 2) Could you give me directions? 3) How much?
Choose 1) or 3). Choosing 2) causes Kiryu to back off — talk to Mina again.
Next, choose from Top, Middle, or Bottom — pick Top or Bottom. Choosing Middle gets a confused reaction and you'll end up choosing Top or Bottom anyway.
1) Don't pretend you didn't hear me! 2) Can you say selling clothes with pride? 3) What's wrong with being a perv?
Choose 2). Choosing 1) or 3) will still lead you to pick 2) eventually.
3) Find schoolgirl Sachiko at [Map 3] and choose 「Tell her to stop selling underwear」. Among the several schoolgirls, Sachiko has long hair and a light blue tie. She stands against a brick wall with a plant beside her. Caution: choosing this option with the wrong girl gets you slapped and nearly incapacitated.
■ Choices with Sachiko:
1) A girl shouldn't do this kind of thing! 2) It's unhygienic! 3) Your parents would be sad!
Choose any two — it doesn't matter.
4) Head back to where Mina was. Moving a little away from that spot triggers a cutscene with a wild-eyed man. A fight with thugs starts. Defeat them and the substory is complete.
RewardSachiko becomes available for hire
#18Beyond the Door
▼
Kamurocho — street ? icon
Trigger: Occurs during the main story in Chapter 6
In the Chapter 6 main story, after meeting the millionaire Fukushima, you head toward Theater Square. The substory triggers at this point — the main story and substory run simultaneously. Go down the stairs to the underground and press □ to scatter money in front of the grubby homeless man to gain access to the Catfight gambling den. You'll get back the ¥100,000 you scattered, and the substory is complete.
RewardCatfight gambling den becomes accessible
#19Heir to the Family
▼
Kamurocho — street ? icon
Trigger: After buying the white suit in Chapter 5
Walking through Hotel District [Map 1], a sketchy young man approaches you with a message, starting the substory. After hearing his message, enter the Yoshida Betting Center at [Map 2]. Inside, an event with a young Daigo Dojima takes place. Receive ¥300 from Daigo at Hi-Tech Land Sega and play the UFO Catcher. Whether you win or lose only slightly changes the dialogue — there are no other failures. After an event at the karaoke snack bar, Daigo gets dragged away somewhere. Head to Champion District [Map 3] to chase after him and fight 3 suspicious men. Enemies are armed with bare hands, a stun gun, and a knife. Win the fight, watch the event, and the substory is complete.
Reward-
#20A Shining Example
▼
Kamurocho — street ? icon
Trigger: Late Chapter 10, when visiting Jinnai Town
Talk to the yankii-style woman at [Map 1] and choose 「Go help them」. Head to where her friend is being attacked and defeat the iron-pipe man (Ryū ga Gotoku 1's Tanzi Shinji). West Park: fight 3 yakuza, then fight 6 more at the office consecutively.
Reward-
#21First Impressions
▼
Kamurocho — street ? icon
Trigger: After completing substory 16
After completing substory 16, step out of the office and back in, then talk to secretary Marina to hear there's another applicant, starting the substory. The interview completing finishes the substory regardless of choices. Guard 「Koshimizu」 becomes available for hire.
■ Choices:
1) Lightning 2) Law 3) Contact
1) Special skill: good with animals 2) Hobby: finding good restaurants
(If you pick 1), you can still undo it by choosing 「Actually, ask about hobbies」.)
1) Stamina to walk around town 2) Knowledge of restaurants 3) Just ask about their skill
1) Why did you apply to our company? 2) You said you respect someone? 3) What's your favorite color?
(Picking wrong choices causes Marina to reject the applicant. Even if rejected, you'll step outside to return a left bag and witness Koshimizu saving a dog — Marina changes her mind and accepts. Wrong answers don't prevent completion.)
Correct answers: 2) → 2) → 2) → 2).
RewardGuard 'Koshimizu' joins your staff
#22A Watery Investment
▼
Kamurocho — street ? icon
Trigger: After Kamurocho Money Island opens in Chapter 5
Walking through Nakamichi Street [Map 1], an event plays where a woman is surrounded by a rough man and an angry man, triggering the substory. Talk to her and fight 2 street thugs. The one with a hat is armed with a stun gun. After the fight, receive 「Toughness Z」 from the woman. Choose 「I have time」 and you'll be taken to Café Alps, where they try to sell you an 「Ahaha Item」 for ¥1,000,000. If you buy it, you head to Sugita Building and Marina points out it looks like a pyramid scheme. Kiryu realizes he was scammed and the substory ends (bad ending). If you resist to the end, you receive Accessory 「Cat Stroking Shoes」 and the substory properly completes.
■ Choices:
1) Decline 2) Sure, I'll buy it
1) Not interested at all! 2) OK, I'll buy it
1) Mid-20s 2) Around 30 3) Late 40s (any is fine; choosing 1) has Nezu surprised, offering ¥500,000 instead)
→ Sales rep Nao appears
1) I'll buy it 2) I will buy it 3) Maybe I'll buy it 4) I won't buy 5) I think I might buy it
(Other choices cause Nao to kiss you and you end up buying anyway.)
1) I think I might buy it 2) Maybe I'll buy it 3) I said I won't 4) I will buy it 5) I'll buy it
Correct answers: 1) → 1) → 3) → 4) → 3)
RewardToughness Z
Accessory: Cat Stroking Shoes (correct choices)
Image Video '22 Mizuki Nao' added to stock
#23Miracle in Maharaja
▼
Kamurocho — street ? icon
Trigger: After completing substory 12 in Chapter 2, then after Kamurocho Money Island opens in Chapter 5
1.After completing substory 12, approach the two men at [Map 1] to hear rumors that Miracle is at Maharaja, triggering the substory. After Kamurocho Money Island opens in Chapter 5, an event triggers at [Map 2]. A large foreign man is at the entrance to Maharaja; talk to him and a fight starts. After the fight, a dance battle with Miracle begins inside Maharaja. Miracle does all combos and racks up a huge step count — it's tough to beat. Even if you lose the dance battle, you still get to choose between a black box and a white box. The black box has Accessory 「Encounter Finder」; the white box has Armor 「Tour T-Shirt」. The Encounter Finder is recommended — it makes thugs easier to spot, making money-grinding much easier. Miracle joins as an advisor for Kamurocho Money Island, completing the substory.
2.Approach the two men at [Map 1] and hear that Miracle is at Maharaja to start the substory. After Kamurocho Money Island opens in Chapter 5,
3.an event triggers at [Map 2]. A large foreign man stands at Maharaja's entrance; talk to him and a fight starts. After the fight, a dance battle begins inside with Miracle. Miracle does all combos and racks up a huge step count — tough to beat. Even if you lose, you get to choose a black box (Encounter Finder) or white box (Tour T-Shirt). Miracle then joins as an advisor for Kamurocho Money Island and the substory is complete.
#24The Girl in the Video
▼
Kamurocho — street ? icon
Trigger: While returning to Kiryu's apartment in Chapter 2; watch 3 or more Image Videos at Gandhara Kamurocho
1) Watch 3 or more Image Videos at Gandhara Kamurocho. After 3 viewings, enter Gandhara to trigger the substory. Image Videos can be obtained as substory rewards. Watching the same video 3 times counts. Talk to the 「jaded man」 and choose 「Watch a video together」. Afterward, obtain Image Video 「11 Minami Riona」. 2) Head near the Hanrai restaurant at [Map 2] and a 「familiar-looking girl」 exits a shop. 3) Report back to the 「jaded man」 in front of Gandhara Kamurocho. 4) Return to Hanrai to watch an event with the jaded man and the 「Girl from the Video?」. A lecherous man approaches mid-event, starting a fight. The jaded man joins in — defeat 2 street thugs to complete the substory.
RewardImage Video '11 Minami Riona' added to stock
Video Boy becomes available for hire
#25Postcard Rookie - Kiryu
▼
Kamurocho — street ? icon
Trigger: Right after Chapter 6 begins, with 5 or more eligible substories completed
Enter the Sugita Building office and a radio cassette starts playing. Kiryu tries to turn it off but the show 「Dolce Kamiya's Postcard — Dolce」 airs, starting the substory. Substories 25, 26, and 27 are a connected series with the same premise. As Marina suggests, examine the desk near the entrance to submit a story to the radio. No matter which radio name you pick first, it becomes 「Judgment Kazu」. You write stories based on substories you've already completed. There are 18 types to choose from but only 7 will be selected. After writing a story, step outside, come back in, and examine the radio cassette to hear the broadcast. If your submission is selected the substory completes. If not, keep submitting until one is chosen. The final reward comes in substory 27.
■ Winning substories (stories):
Substory 1 「The Visionary Fortune-teller」
Substory 2 「Arakure Quest」
Substory 7 「How to Train Your Dominatrix」
Substory 11 「The Shrink-wrapped Dream」
Substory 12 「Miracle on Tenkaichi Street」
Substory 14 「Destiny Calls」
Substory 23 「Miracle in Maharaja」
Reward-
#26Postcard Pro - Kiryu
▼
Kamurocho — street ? icon
Trigger: After completing substory 25
After completing substory 25, examine the office desk to submit another story. Same method — pick a winning story, submit it, then examine the radio cassette to hear if it's selected. Winning substories are the same as listed in substory 25.
Reward-
#27Postcard Master - Kiryu
▼
Kamurocho — street ? icon
Trigger: After completing substory 26
After completing substory 26, examine the office desk to submit another story. Same method — select a winning story, submit it, then check the radio cassette. For the final submission, Dolce Kazuya visits the office in person to deliver the reward, completing the substory. Winning substories are the same as listed in substory 25.
RewardAccessory: Heavy-duty Gloves
#28Don't Dance Alone
▼
Kamurocho — street ? icon
Trigger: While returning to Kiryu's apartment in Chapter 2; dance at Maharaja 3 or more times
1) Play the dance minigame at Maharaja Kamurocho 3 times — win or lose doesn't matter. After 3 plays, the substory triggers. Face 「the lightweight-looking man」 Hisaaki in a dance battle. Easy difficulty is fine; Hisaaki is very beatable. You can retry if you lose. Win the dance battle to complete the substory.
Reward-
#29Technique to Die For
▼
Kamurocho — street ? icon
Trigger: After completing substory 28
1) After completing substory 28, step out of Maharaja and come back in. Head near the bar counter inside Maharaja Kamurocho and 「Ishidoori Maiko」 approaches you, triggering the substory. Another dance battle begins — win to complete the substory. Easy difficulty is fine. You can retry if you lose.
Reward-
#30Maharaja Showdown
▼
Kamurocho — street ? icon
Trigger: After completing substory 29
1.1) After completing substory 29, step out and come back in. Listen to Hisaaki and Maiko's conversation. Note: OGITA is the same 「Okita Kan」 who taught Haruka Sawamura to dance at the Dyna Chair talent agency in Yakuza 5. Talk to OGITA sitting in a chair and start the dance battle.
2.2) OGITA keeps building step count while dancing, making him somewhat difficult even on Easy. To win: rack up as many steps as possible and input the on-screen buttons accurately. This raises your score. Hitting Fever Hits 2 or more times should be enough to beat OGITA.
3.3) The choice after winning doesn't matter — it only slightly changes OGITA's reaction. Receive the Valuables 「Isobe Fan」 and the substory is complete. Each time Kiryu dances afterward, the bodycon women around him will hold up the Isobe Fan as they dance.
RewardValuables: Isobe Fan
#31The Innocent Hook-up
▼
Kamurocho — street ? icon
Trigger: After buying the white suit in Chapter 5
Make a date with Riku at the play spot 「Teruteru-boya」 in Kamurocho. Riku wears a light blue swimsuit, light blue clothes, and has a short cut. ■ How to identify her: When you arrive at Theater Square there are 2 women waiting. Choosing 「Observe from the side」 makes both turn at the same time. Choosing 「Observe from the front」 makes them turn again simultaneously. If one position stays fixed, 「Talk to the inner woman」 is the correct answer.
RewardRiku's contact info
Image Video '08 Minato Riku' added to stock
#32The Sexy Hook-up
▼
Kamurocho — street ? icon
Trigger: After buying the white suit in Chapter 5
Make a date with Ayaka at the play spot 「Teruteru-boya」 in Kamurocho. Ayaka wears a white swimsuit, purple clothes, and has long hair. ■ How to identify her: When you arrive at Theater Square there are 2 women waiting. Choose 「Get closer to look」. The waiting women increase from 2 to 3, then choose 「Talk to the innermost woman」 to complete.
RewardAyaka's contact info
Image Video '07 Tomoda Ayaka' added to stock
#33The Flirty Hook-up
▼
Kamurocho — street ? icon
Trigger: After buying the white suit in Chapter 5
Make a date with Haruki at the play spot 「Teruteru-boya」 in Kamurocho. Haruki wears a pink swimsuit, reddish clothes, and has her hair up. ■ How to identify her: When you arrive at Theater Square there are 2 women waiting. Choose 「Wait until she looks this way」 and a hint appears. 「Talk to the inner woman」 is the correct answer. If you choose 「Wait until she looks this way」 a second time, a homeless man shows up and you fail. Choosing the correct option triggers an appearance by her ex-boyfriend and a fight starts. Defeat him to complete the substory.
RewardHaruki's contact info
Image Video '06 Sato Haruki' added to stock
#34Sakura Shock
▼
Kamurocho — street ? icon
Trigger: After buying the white suit in Chapter 5
Make a date at the play spot 「Teruteru-boya」 in Kamurocho. No matter how long you wait, the other person never shows up. The date ends with Kiryu realizing he was stood up, and the substory is complete.
Reward-
#35Verbal Warning
▼
Kamurocho — street ? icon
Trigger: After buying the white suit in Chapter 5
Make a date with Mirei at the play spot 「Teruteru-boya」 in Kamurocho. One unattractive woman wearing glasses with a light blue swimsuit, light blue clothes, and a short cut is waiting. Kiryu gets dragged on a date against his will, his HP gauge drains, and the substory is complete.
Reward-
#36I Am Kazuma-kun
▼
Kamurocho — street ? icon
Trigger: When the bond with Pocket Circuit Fighter reaches 40% in substory 50
1) When the bond gauge with Pocket Circuit Fighter is around 40% from substory 50, Takuma approaches you inside the Pocket Stadium to trigger the substory. Takuma challenges you to a race — accept. His car is slow so you can win easily. After the event, receive machine sticker 「Aqua Blue」 and the substory is complete.
RewardSticker: Aqua Blue
#37The Rocky Road of Romance
▼
Kamurocho — street ? icon
Trigger: After completing substory 36
1.1) After completing substory 36, pass in front of the children's park for a cutscene with Takuma and Hideki. Approach them and listen to their story to trigger the substory.
2.2) Enter the Pocket Stadium and talk to the kids to start a race. Win to complete the substory. You can retry if you lose. You can lead at first but get overtaken — use boosts to hold the lead. Recommended parts: Machine: Golem Tiger / Tires: Super Slick / Pins: Super Middle / Motor: Super Speed / Gear: Super Mid / Battery: High-speed / Bumper: None
Reward-
#38Gift of Love
▼
Kamurocho — street ? icon
Trigger: After completing substory 37
1) After completing substory 36, talk to Mika inside the Pocket Stadium to start the substory. Race against Mika and win. You can retry if you lose. Recommended parts: Machine: Golem Tiger / Tires: Super Barrel / Pins: Super Speed / Motor: Super Speed / Gear: Super Mid / Battery: Normal / Bumper: None. You can lead for about 10 laps; use boosters in the later laps if someone starts overtaking. After winning, receive Machine 「DRA-GON」 and Gear 「Dash Gear」. A suspicious man is seen watching nearby, and the substory is complete.
RewardMachine: DRA-GON
Gear: Dash Gear
#39Suspicion of Perversion
▼
Kamurocho — street ? icon
Trigger: After completing substory 38
1) After completing substory 38, enter the Pocket Stadium for a substory with the mysterious man 「Satoru」. After the event, race against Satoru. Win to complete. Retry if you lose. Recommended parts: Machine: DRA-GON / Tires: Super Spike / Pins: Super Metal / Motor: Super Speed / Gear: Dash Gear / Battery: High-speed / Suspension: None / Bumper: None
Reward-
#40The Prodigious Racer
▼
Kamurocho — street ? icon
Trigger: After completing substory 39
1) After completing substory 39, enter the Pocket Stadium for a substory with girl 「Sena」. After the event, race against Sena. Win to complete. Retry if you lose. Recommended parts: Machine: DRA-GON / Tires: Ultra Lo-Height / Pins: Ultra Metal / Motor: Ultra Speed / Gear: Ultra Mid / Battery: High-speed / Suspension: None / Bumper: Bumper Plate
RewardSticker: Sunny Yellow
#41The Woman They Call Professor
▼
Kamurocho — street ? icon
Trigger: After completing substory 40
1.1) After completing substory 40, enter Achansa at [Map 1] to trigger the substory. Listen to Harumi's story then go to the Pocket Stadium and beat Harumi in a race. Retry if you lose. After winning receive Machine 「Cool Striker」 and Part 「Heavy Suspension」 to complete the substory. Parts: Machine: DRA-GON / Tires: Ultra Spike / Pins: Ultra Quick / Motor: Ultra Speed / Gear: Super Mid / Battery: High-speed / Suspension: None / Bumper: None
2.Enter Achansa at [Map 1] to trigger the substory. Listen to Harumi's story, go to the Pocket Stadium and beat Harumi. Retry if you lose. After winning receive Machine 「Cool Striker」 and Part 「Heavy Suspension」. Parts: Machine: DRA-GON / Tires: Ultra Spike / Pins: Ultra Quick / Motor: Ultra Speed / Gear: Super Mid / Battery: High-speed / Suspension: None / Bumper: None
RewardMachine: Cool Striker
Part: Heavy Suspension
#42The Greatest Glory
▼
Kamurocho — street ? icon
Trigger: After completing substory 41
After completing substory 41, enter the Pocket Stadium for 「Kazuyoshi」's substory. Race against Kazuyoshi and win. Retry if you lose. Receive Sticker 「Dark Purple」 to complete the substory. Parts: Machine: Cool Striker / Tires: Extreme Barrel / Pins: Extreme Quick / Motor: Extreme Speed / Gear: Extreme Mid / Battery: Normal / Suspension: Middle / Bumper: Hyper Plate. If you have the budget, buying the 「Bishamonten Motor」 makes winning much easier. Without it, the above setup still wins by 1-2 seconds. Use boosts after landing from the jump ramps at LAP 5 and 10.
RewardSticker: Dark Purple
#43The Fighter's Crown
▼
Kamurocho — street ? icon
Trigger: After completing substory 42, bond with Pocket Circuit Fighter at 100%
With the required conditions met, enter the Pocket Stadium for a substory where Pocket Circuit Fighter challenges you. Accept at the counter and race on the special 「Fighter SP Course」. Win to complete the substory. Retry if you lose. After winning, you can talk to previous racers to race them again. Parts: Machine: Cool Striker / Tires: Extreme Spike / Pins: Extreme Middle / Motor: Bishamonten Motor / Gear: Extreme Normal / Battery: High-speed / Suspension: Heavy / Bumper: Hyper Plate. Winning requires some luck — the course is rough and your machine can go off-track frequently, draining the gauge quickly. Risk of 2 consecutive course-outs; quitting quickly to retry is recommended.
Reward-
#44The Predator's Call
▼
Kamurocho — street ? icon
Trigger: After buying the white suit in Chapter 5
Make a date with a woman named Mariya at the play spot 「Teruteru-boya」 in Kamurocho. When you arrive at the meeting place, a rather large-framed woman is waiting. Kiryu gets dragged on a date against his will, his HP gauge drains, and the substory is complete.
Reward-
#45A Mother's Touch
▼
Kamurocho — street ? icon
Trigger: After buying the white suit in Chapter 5
Make a date with a woman named Sayuri at the play spot 「Teruteru-boya」 in Kamurocho. When you arrive at the meeting place, an older woman is waiting. Kiryu gets dragged on a date against his will, his HP gauge drains, and the substory is complete.
Reward-
#46The Stop-and-Search Specialist
▼
Kamurocho — street ? icon
Trigger: While returning to Kiryu's apartment in Chapter 2
Walk through [Map 1] and Officer 「Kikuchi」 stops you, triggering the substory. He checks your belongings — just show him an item to complete the substory. Even showing weapons or suspicious items just changes his reaction slightly; it still counts. ■ To reach 100% bond: After the substory, a bond event starts with 「Stop-and-Search Officer Kikuchi」. Change areas and pass in front of Kikuchi — he'll stop you each time. Show him an item to raise the bond gauge. Note: you're stopped automatically when passing him, not by talking to him directly. When the gauge reaches ~80%, an event occurs where a frail woman is surrounded by delinquents. Kikuchi joins the fight — defeat 4 street thugs. Receive the 「Proxy Stone」 from the woman to complete the bond event. Image Video 「27 Otoha Nanase」 is also added to Gandhara.
Reward■ Bond gauge 100%
Accessory: Proxy Stone
Image Video '27 Otoha Nanase' added to stock
Officer Kikuchi becomes available for hire
#47The Mushroom Merchant
▼
Kamurocho — street ? icon
Trigger: While returning to Kiryu's apartment in Chapter 2
1.Talk to the 「suspicious man」 near the Dream Machine vending machine to start the substory. Fight and defeat the street thugs. Receive 「Enoki Mushrooms」 from the mushroom merchant to complete the substory. ■ To reach 100% bond: After the substory, a bond event starts with 「Mushroom Merchant」. Buy mushrooms to raise the bond gauge — buy cheap ones one at a time. When the gauge reaches ~30%, the merchant disappears. Step into any shop to change areas, then return to [Map 1]
2.to find the mushroom merchant in trouble at [Map 1]. Fight 2 street ruffians. Any choice after is fine. When the gauge reaches 60%, he disappears again — change areas and return to find him being accosted by 3 yakuza; defeat them. Again, any choice is fine. At 80%, he disappears again — return to find him surrounded by 5 mafia; rescue him to reach 100%. At 100% bond the mushroom merchant permanently leaves town.
RewardEnoki Mushrooms
Mushroom shop opens
■ Bond gauge 100%
Mafia Boss becomes available for hire
#48Kamurocho's Mr. Libido
▼
Kamurocho — street ? icon
Trigger: After buying the white suit in Chapter 5
1.Walk down the alley next to POPPO Showa Street and an oddly shiny man (Mr. Libido) approaches you, starting the substory. If he's not there, enter a shop to change areas and try again. Based on the story, you may need to have phone cards to trigger the substory. Just listening to Mr. Libido's story completes the substory. ■ To reach 100% bond: Find Mr. Libido at [Map 1] and show him your collected phone cards to raise the bond gauge.
2.After showing him cards, he immediately leaves. Enter a shop to change areas and he'll be back. Exact count unknown but ~30 phone cards seems needed to max the bond. When the gauge reaches 80%, Mr. Libido stands distressed at
3.[Map 1]. Talk to him then enter Achansa at [Map a] for an event. After the event with Achansa's Madam, report back to Mr. Libido to achieve the bond.
Reward-
#49Kamurocho's Mr. Moneybags
▼
Kamurocho — street ? icon
Trigger: After meeting Millionaire Fukushima in Chapter 6
After meeting Millionaire Fukushima in the main story, approach him at Vincent to trigger the substory. You gain access to the 「Investment Fund」 system which lets money flow between the two protagonists (minus a fee). You also gain access to the 「Shared Item Box」 for trading items between them. Receive ¥10,000,000 from Fukushima to complete the substory. ■ To reach 100% bond: Each investment raises the bond gauge. First investment is fixed at ¥10M (15% fee, reduced to 10% next time). Chapter 6: 1 investment possible. 2nd: after Majima invests in Chapter 7, available from Chapter 9 (¥100M, fee drops to 5%). 3rd: after Majima invests in Chapter 11, available from Chapter 14 (¥1B). 4th: after Majima invests in Chapter 15, available from the final chapter (¥10B, free fee). Bond achieved. Thereafter invest any amount freely.
Reward¥10,000,000
#50Pocket Circuit Fighter!
▼
Kamurocho — street ? icon
Trigger: While returning to Kiryu's apartment in Chapter 2; at the Pocket Circuit Stadium
Talk to 「Pocket Circuit Fighter」 at the Pocket Circuit Stadium to open a tutorial race. Follow the instructions and win your first race to complete. Be mindful of boosts, the heat gauge, and going off-course.
RewardMachine: Golem Tiger
One of each starter part
Machine: Devil Killer
■ Bond gauge 100%
Course editing unlocked
Pocket Circuit Stadium property obtained
#51Miho, Convenience Store Clerk
▼
Kamurocho — street ? icon
Trigger: While returning to Kiryu's apartment in Chapter 2
Buy anything at POPPO Tenkaichi Street to trigger the substory. Just listen to clerk 「Miho」's story to complete it. ■ To reach 100% bond: After the substory, a bond event starts with 「Convenience Store Clerk Miho」. Keep buying items to build the bond gauge. Buy cheap food items — it's the number of purchases that raises the gauge, not the price or quantity. At 50%, she'll ask you a question; answers only slightly change the content. At 80%, receive 「Miso Katsu Bento」. At 100%, Image Video 「30 Toono Miho」 is added to Gandhara. The Miso Katsu Bento also gets added to the store's inventory.
RewardMiso Katsu Bento
■ Bond gauge 100%
Miso Katsu Bento added to store inventory
Image Video '30 Toono Miho' added to stock
POPPO Tenkaichi Street (property) obtained
#51Miho, Convenience Store Clerk
▼
Kamurocho — street ? icon
Trigger: While returning to Majima's apartment in Chapter 3
Head behind a building pillar on Bunzaemon Alley (Map 1) to be approached by a 「man in hiding」 whose school uniform trousers were stolen, triggering the substory. After the event, fight and defeat a thug. Go to [Map 2] and fight a mysterious boy (young Ryuji Goda) — defeat him. Return the uniform trousers to their owner (Map 3). Head to the spot next to the takoyaki shop (Map 4) and watch the event to complete the substory.
Reward-
#52Emiri, Mach Bowl Receptionist
▼
Kamurocho — street ? icon
Trigger: While returning to Kiryu's apartment in Chapter 2; after conquering the Leisure King area in Chapter 5
Play bowling at Mach Bowl to trigger the substory. Playing a solo 3-frame game is recommended. Finishing the game completes the substory. ■ To reach 100% bond: Bond gauge rises each time you play bowling. Quitting mid-game doesn't count. At 80%, an event is supposed to happen at Mach Bowl, but you must first defeat the Leisure King at Kamurocho Money Island in Chapter 5, then visit Mach Bowl. (Before that, bowling doesn't raise the gauge.) Get a Turkey (3 strikes in a row) to max the bond. After achieving the bond, visit Mach Bowl again and talk to Emiri to receive the Mach Bowl property.
Reward■ Bond gauge 100%
Manager 'Koketaro' joins your staff
Image Video '18 Okazaki Emiri' added to stock
Mach Bowl (property) obtained
#52Emiri, Mach Bowl Receptionist
▼
Kamurocho — street ? icon
Trigger: While returning to Majima's apartment in Chapter 3
Walking through Sotenbori, a 「flustered woman」 asks Majima to pretend to be her boyfriend, starting the substory. Rewards differ by choices made. Go through all choices to complete the substory.
■ Choices:
1) Nice to meet you! I'm Goro Majima! 2) Father, pleased to meet you. 3) Please make my breakfast every day.
(Any is fine.)
1) Dentist 2) Cabaret club manager 3) Yakuza
1) We met when she tried to pick me up 2) We sat next to each other in a cinema 3) I crashed into Cocoa who was running with bread in her mouth
1) What do you mean, a lie? 2) I confess!
Correct answers: any → 1) → 2) → 1).
RewardDwarf's Belt (correct choices)
Bulletproof Glass Amulet (wrong choices)
Image Video '12 Aisu Kokoa' added to stock
#53Sushi Gin's Chef
▼
Kamurocho — street ? icon
Trigger: While returning to Kiryu's apartment in Chapter 2
Eat something at Sushi Gin to trigger the substory. Just listen to the chef's story to complete it. ■ To reach 100% bond: Bond gauge rises each time you eat at Sushi Gin. Buy the cheapest item once per visit — the count is by meal frequency, not price or quantity. At 30%, the chef offers to cook your caught fish. Giving fish raises the bond gauge further. Take a taxi to 「Tokyo Pier」 for ocean fishing; examine the fishing spot to get the 「Beginner's Fishing Rod」. At 80%, an event with a critic-looking man occurs, bringing the gauge to 100%. After Kamurocho Money Island opens in Chapter 5, you'll receive the property and a fishing rod.
RewardChef will prepare your fish
■ Bond gauge 100%
Sushi Gin (property) obtained
Fishing Rod: Ocean King
#53The Man Who Changed His Face
▼
Kamurocho — street ? icon
Trigger: While returning to Kiryu's apartment in Chapter 3
1.Talk to the 「sleepy man」 at Aziwaba Park to start. Return a ball to a child then talk again. Hear Akatani's circumstances and move on.
2.After an event near Yusuke at [Map 3], fight 4 street thugs. Taking out the gun-wielding enemy first is the safest approach.
Trigger: While returning to Kiryu's apartment in Chapter 2
Play the racing game 「OutRun」 at Hi-Tech Land SEGA. Finish a game and the clerk Luka approaches you, triggering the substory. Talk to her to complete. ■ To reach 100% bond: Playing OutRun raises the bond gauge. Quitting mid-game doesn't count. At ~40%, you need to beat Luka's high score of 1,500,000. The gauge won't rise until you achieve it — keep trying. LOW gear alone won't reach 1.5M; press □ to switch to HI gear. Exceeding 1.5M earns Accessory 「Awakened Hood」. At 80%, you need to beat Luka's score of 3,000,000. HI gear from the start and multiple passes can get you there. No need to brake on curves — hold ○ and steer with the d-pad. At 100%, Super Hang-On is added to Hi-Tech Land SEGA.
RewardAwakened Hood
■ Bond gauge 100%
Super Hang-On added to arcade
Hi-Tech Land Sega Nakamichi St. (property) obtained
Image Video '16 Kanae Ruka' added to stock
#54Luka at SEGA HI-TECH LAND
▼
Kamurocho — street ? icon
Trigger: While returning to Majima's apartment in Chapter 3
Walking through Shofukucho Street (Map 1), a substory triggers with a pleading woman arguing with a strangely-dressed group. Talk to Iori's mother to hear her story, then join the 「Munanchohepetona Religion」. Receive a 【Handmade Talisman】 then approach the cult members at [Map 2]. Several choices and a test follow. The material reward from Munanchosuzuki changes based on how many test answers are correct. Getting 3+ wrong answers starts a fight with 4 members, but even choosing correct answers ultimately leads to the same story. Then defeat Munanchosuzuki to complete the substory.
■ Choices:
1) I want to join the Serencho Habatorasukyou 2) I want to join the Avanchoh Deshitoresukyo 3) I want to join the Munanchohepetona Religion
→ At the Shure-pipi training hall, talk to Iori:
1) When almonds die they become diamonds 2) You're Iori, aren't ya? 3) I am Munanchohepetona
1) Greet with a pose 2) Greet with voice only 3) Don't greet
→ Test questions:
1) Thank you 2) Munancho 3) Hepetona
1) Shure-pipi 2) Shure-pupu 3) Shure-popo
1) Raise both arms and cry out 2) Rotate left arm then clasp both hands 3) Shake your hips and get excited
1) Munanchosuzuki 2) Munanchotanaka 3) Munanchosato
→ Move to the leader's room. If all correct answers were chosen, receive crystal from the leader.
1) Let's do Shure-pipi together instead! 2) I am Munanchohepetona 3) Your mom's crying about it!
Correct answers: 3)→2)→1)→3)→1)→2)→1)→3)
For Timber: 3)→1) (then 3 from next options)→3)→1)→3)→3)→3)→fight
For Tamahagane Steel: 3)→2)→2)→2)→1)→2)→2)
Reward
#56A Taxing Issue
▼
Kamurocho — street ? icon
Trigger: While returning to Majima's apartment in Chapter 3
Walk through the Houjinsha Alley and see salarymen angry at a 「neatly-dressed man」, triggering the substory. Talk to the man and fight 4 thugs. Defeat them, then talk to Taiyo — the reward changes based on your choices.
■ Choices:
1) To torment the citizens 2) To provide public services 3) Tax is citizens repaying the government
1) The entertainment industry 2) Tobacco 3) Mr. Sato
1) Air 2) Pets 3) Gasoline
1) 5% 2) 8% 3) 50%
Correct answers: 2) → 2) → 3) → 2)
For Ao-damo Wood Chip: 3) → 1) → 2) → 2)
For Water God Stone: 1) → 2) → 1) → 3)
RewardAncient Guardian Stone (correct choices)
Ao-damo Wood Chip (middling choices)
Water God Stone (wrong choices)
#76Sotenbori's Mr. Moneybags
▼
Kamurocho — street ? icon
Trigger: While heading to Cabaret Grand in Chapter 7
Pass in front of Cabaret Grand and a friendly man approaches you, triggering the substory. After the event, Majima can also press □ to scatter money. Listen to Millionaire Tanioka's story to complete the substory. ■ To reach 100% bond: Each investment raises the gauge. First investment is fixed at ¥10M (15% fee, reduced to 10% next time). Chapter 7: 1 investment possible. 2nd: after Kiryu invests in Chapters 9–10, available from Chapter 11 (¥50M, fee drops to 5%). 3rd: after Kiryu invests in Chapter 14, available from Chapter 15 (¥100M). 4th: before the final battle in the Final Chapter (you can switch protagonists at this point; ¥500M, free fee). Bond achieved. Thereafter invest any amount freely.
Reward¥10,000,000
#89Bacchus's Training
▼
Kamurocho — street ? icon
Trigger: After giving liquor to the homeless man in Chapter 2
1.This substory is unavoidable during the main story. After giving liquor to the homeless men and heading toward Champion District, an event occurs.
2.Listen to Bacchus's story at [Map 2] and a fight with a 「mysterious man」 armed with a pistol begins. Defeat him to complete the substory. Bacchus's training becomes available afterward.
RewardBacchus's training becomes available; Thug Style skills unlocked
#90Kamoji's Training
▼
Kamurocho — street ? icon
Trigger: While returning to Kiryu's apartment in Chapter 2
Approach Kamoji at [Map 1] to start the substory. Just listen to Kamoji's training pitch to complete it. Afterward, pay Kamoji at Shichifuku Park to take his training.
RewardKamoji's training becomes available; Rush Style skills unlocked
#91Miss Tatsu's Training
▼
Kamurocho — street ? icon
Trigger: After acquiring the Beast Style in Chapter 2
Take a taxi to 「Tokyo Pier」. Tatsu is there — talk to her to start the training. Even doing nothing and failing the training still completes the substory. Afterward, pay Miss Tatsu to take her training.
RewardMiss Tatsu's training becomes available; Beast Style skills unlocked
#92Apex Predator
▼
Kamurocho — street ? icon
Trigger: After your first fight with a money-hungry thug
Roaming the field, defeat the money-hungry thug 「Egashira」. Approach Egashira when you encounter him and fight to receive the substory. Defeat him to complete. Tip: use drink items that restore the heat gauge and activate weapon heat actions for an easy win.
Reward-
#93A Dream Unfulfilled
▼
Kamurocho — street ? icon
Trigger: After completing substory 92, when encountering a money-hungry thug
Roaming the field, defeat the money-hungry thug 「Sato Yuki」. Approach Sato Yuki when you encounter him and fight to receive the substory. Defeat him to complete. Tip: use drink items that restore the heat gauge and activate weapon heat actions for an easy win.
Reward-
#94The Head of the Clan
▼
Kamurocho — street ? icon
Trigger: Final Chapter, in Kamurocho before the final battle (all Kiryu substories except #94 complete)
After completing all Kiryu substories except #94, this triggers in Kamurocho before the final battle. A duel with the Head of the Clan (Amon). Win to complete.
RewardAmon's Sunglasses
#100Sotenbori in Peril
▼
Sotenbori — before the final battle
Trigger: Final Chapter, in Sotenbori before the final battle (all Majima substories except #100 complete)
After completing all Majima substories except #100, triggered in Sotenbori before the final battle by an anomalous pager signal. A duel with Amon Shin. Win to complete.
RewardAmon's Sunglasses
Majima33
#49From the Heart
▼
Sotenbori — street ? icon
Trigger: While returning to Majima's apartment in Chapter 3
1.Head to Le Marché and an event starts with a clerk and a male customer arguing, triggering the substory. Talk to the male customer — the heart necklace he wanted is sold out and he asks Majima to find even a knockoff.
2.Go to [Map 2] for a cutscene with a 「suspicious foreigner」. Receive 「Fancy's Business Card」 and return to the male customer to hand it over. Move away from that spot a bit, then head to the forger's office. Fight 3 Chinese men inside. After the event, receive 「Hidden Wallet」 from the man. Substory complete.
RewardAccessory: Hidden Wallet
Image Video '28 Kuribayashi Riri' added to stock
Collectibles
2 categories
Region-by-region collectibles and side-mission rewards grouped by category.
Telephone Cards (90 total — 30 actresses × A/B/C)
Kiryu (Kamurocho) holds 45 cards, Majima (Sotenbori) holds 45. Each actress has A/B/C — bring all three to the collector for ¥5,000,000 per complete set. Cards must be collected in A→B→C order to appear.
90▼
Equip the Card Watcher to mark shining cards on the minimap. Hand sets to Kiryu's collector behind Pink St. (Akimoto) or Majima's collector east of Sotenbori.
Beyond the ¥5M payout, completing sets raises affinity with collector Akimoto for additional rewards.
Click a red dot on the map to view its card. Collected dots are marked with a green check.
Collected
0 / 45
Complete A/B/C sets and speak to the Card Collector for ¥5,000,000.
Y0's video content lives at the Gandara (ガンダーラ) video shop. Watching standard image videos repeatedly raises affinity with the clerk; specific triggers unlock substories + special clips. There is no flat 30-clip checklist — what matters is affinity + side triggers.
5▼
First viewing at Sotenbori Gandara auto-triggers a substory + starts the clerk's bond gauge.
Watch any image video 3 times at the Senryo St. North Gandara then re-enter to trigger substory 'Video Girl'.
Affinity 90+: watch a video → talk to the white-dressed woman in front of the Odyssey warehouse → buy 'Oden Assortment' at M-Store Shofukucho → give it to her → obtain the 'Special Video'.
#01Gandara Sotenbori — First Video + Substory
Sotenbori — east alley
Accessible during Majima chapters. First viewing auto-triggers the venue substory.
Yakuza 0 has one of the densest minigame spreads in the series. For the Completion List and the 'What a Player' trophy you'll need to touch every entry below at least once. The notorious ones (mahjong, billiards, Fantasy Zone) go much smoother with the videos attached.
Gambling
Mahjong
Difficulty
Mahjong parlors in Kamurocho & Sotenbori
Standard Japanese riichi mahjong — the series' biggest wall if you don't know the rules, but one pattern is enough for completion.
Keep your hand fully closed (never call Pon/Chi) so you can declare Riichi.
Chase Tanyao (only simples 2–8). When you're one tile from 4 sets + a pair, declare Riichi — a yaku attaches automatically.
Completion only needs wins, not big scores — prioritize fast hands over value.
If you want to use Tanyao, turn the 'Kuitan (open Tanyao)' rule ON in settings — with it off, a Tanyao hand that used Pon/Chi won't count as a yaku and you can't win.
Set the match length to 'East-only (Tonpuusen)' — games end much faster, so you can grab a single win and get out.
Winning off a closed Riichi hand adds the Riichi yaku plus ura-dora on top, inflating your score — lean on Riichi if you also want the high-score targets.
9-ball pool plus carom (cannon) and combination shots. The 3-carom and 3-combination completion targets are what make it infamous.
Ghost-ball rule: to sink a ball, aim so the cue ball strikes the point on it directly opposite the pocket.
A carom is when the cue ball hits one ball then another — line two balls up in solo play to farm it easily.
Leave spin off at first and value aim over power.
In Solo 9-ball you can deliberately foul (scratch) to place the cue ball where you want — keep fouling to rearrange the balls until your carom/combination setup is ready.
Bar games
Darts
Difficulty
Bars in Sotenbori
301 and Cricket modes — you time your throw as the reticle sways side to side.
Release the instant the reticle crosses your target (bullseye or triple-20).
In 301 don't force triples — steady 20s and bulls that bring you to exactly zero win it.
A mini-car tuning racer — setup matters more than driving, and late cups are near-impossible without the right build.
Gear for top speed on straight tracks; add grip tires + downforce on curvy ones to stop flying off.
Heavy parts drain the battery and stall you late — balance for a weight that finishes.
Stuck on a cup? Copy a recommended build from the video and it usually clears.
Reliable all-rounder: max-speed motor (Godspeed/High Torque 2.0), Power Gears, and a Toughness/High-Capacity battery tame the over-acceleration so the car stops flying off course — this clears most cups.
Music / rhythm
Disco
Difficulty
Maharaja disco (Majima)
A rhythm game — match the prompt timing to build score and beat dance-battle rivals like the Disco Queen.
Input slightly early, just before each prompt reaches the line, to land Perfects.
'Friday Night' is the easiest track — best for learning the timing.
For the high-score Miss Isobe battle, memorize the input pattern from a full-combo video.
Score comes from Steps, not combos: each note is 40 pts, each step +10 (up to 9 = +90), but combo bonus is only +2 after 6. Don't miss notes and squeeze in as many steps as possible before each prompt.
Music / rhythm
Karaoke
Difficulty
Karaoke bars in both cities
A timing rhythm game with series classics like 'Bakamitai'; completion wants a target score on every track.
Input exactly as the note overlaps the ring — trust the on-screen cue over the music's beat.
Kiryu and Majima have different song lists — check both.
Real SEGA arcade ports — OutRun, Space Harrier, Super Hang-On, Fantasy Zone. Fantasy Zone is the trickiest for a high score.
Fantasy Zone is money-management: spend coins at the balloon shop on ① engines (speed), ② a strong weapon (Wide Beam/Laser), ③ bombs for bosses.
Destroy all 10 bases in a stage to summon the boss — it takes more damage up close.
In OutRun, take the easier fork to reach checkpoints reliably.
For 100k points, prioritize engines: weapons/bombs are time- or ammo-limited and lost on death, but engine (speed-up) upgrades persist until you die — spend coins on engines and an extra life first.
Sotenbori
Cat Fight
Difficulty
Cat Fight club, Sotenbori (Majima)
A betting-plus-management minigame: recruit and train fighters, then win tournaments.
Field the fighter who out-stats the opponent in weight, technique, and stamina.
Reinvest winnings into upgrades and new recruits to deepen your roster.
Attack strength is Rainbow > Red > Green > Blue > White. Read the opponent's icon color and counter accordingly: on White they're using their weakest move (use your weak one), on Red answer with your strongest.
Opponents most often throw their highest-star move, so spamming the single counter to their 5-star attack often works (e.g. if their Rock is 5-star, keep picking Rock yourself).
Misc
Fishing
Difficulty
Sotenbori river (freshwater) & Tokyo pier (saltwater)
Completion wants the full log: 15 freshwater + 18 saltwater fish, each with set spawn spots.
Reel when the float dips; when the line glows red (tension), pause so it doesn't snap.
Big fish (sharks, oarfish) only bite at specific spots — follow the log/video locations.
The three trophy fish (Great White, Marlin, Oarfish) all appear from the RIGHT spot of the Tokyo (Kamurocho) pier — fish the right side, not the left.
Oarfish and Tuna won't bite on normal bait — buy and equip 'Quality Bait' from the M Store first to make them appear.
Misc
MesuKing (beetle card battle)
Difficulty
Sotenbori (Majima)
A rock-paper-scissors-plus-stats card battle where you beat rival NPCs in sequence.
STR > TECH > SPD > STR. Each rival favors a fixed type — lose once, learn it, then counter-pick.
Technique cards hit hardest with a full gauge — save them for close rounds.
Equip the 'Taunt' skill card — it forces the opponent to pick their hand before you, so you can always counter-pick. It's the strongest setup, so grab it first.
Build around the highest-Power insect card rather than Technique — bigger damage per won hand ends rounds faster.
Misc
Telephone Club
Difficulty
Sotenbori (Majima)
A phone-dating minigame: pick responses that match what the caller wants to raise affection.
Read whether she wants bold or gentle replies and match it — completion counts after one play.
Trigger: While returning to Majima's apartment in Chapter 3
1.Examine the artist copying the Iwaobashi statue to start. Move away from the statue and approach again to advance the event. Help Tokokichi who can't use the bathroom. Correct choices: 3→3→3. After a fight with street punks,
2.talk to Tokokichi in front of the pizza shop at [Map 2] to complete.
RewardStaminan Royale (correct choices)
Staminan X (wrong choices)
#55Calling the Future
▼
Sotenbori — street ? icon
Trigger: While returning to Majima's apartment in Chapter 3
1.Try to pass through the west end of Sotenbori and an event triggers with a man talking on a shoulder bag phone, starting the substory. He offers to let you use the shoulder phone.
2.Buy 「Batteries」 at Don Quijote at [Map 2] and hand them over. He says his shoulder hurts,
3.so buy 「Toughness Z」 from Daikoku Drug at [Map 3] and hand it over. Handing it over triggers a fight with 2 street thugs. Defeat them. Talk to the man at M Store Shofukucho to complete the substory. After completion, talking to him allows you to save.
RewardSaving at Shofukucho West becomes possible
#57Crossed Words
▼
Sotenbori — street ? icon
Trigger: While returning to Majima's apartment in Chapter 3
Try to pass in front of Gedoraku on the east end of Sotenbori and a substory triggers with a 「desperate man」 and a 「troubled woman」 struggling over a crossword puzzle. Majima steps in to solve it for them. Right or wrong answers change the reward. Intentionally picking wrong answers makes the man's reactions more entertaining.
■ Choices:
1) Sense battle 2) News battle 3) Dance battle
1) Thirty-six stratagems 2) Flee in panic 3) Midnight escape
1) Jewelry 2) A kiss 3) A heart
1) Rolled omelette 2) French fries 3) Corn salad
Correct answers: 3) → 2) → 3) → 2)
RewardPearl (correct choices)
High-quality Iron (wrong choices)
Image Video '26 Hasegawa Shizuku' added to stock
#58Stadium Jumper Strut
▼
Sotenbori — street ? icon
Trigger: While returning to Majima's apartment in Chapter 3
1.Find a 「collapsed man」 near Iwao Bridge and talk to him to start the substory. You need to give him a recovery item,
2.so buy 「Toughness Z」 at M Store at [Map 2] and hand it over. Defeat the thugs that attack as Suda walks across the bridge. Slugger Style to sweep them all at once is effective. Once Suda crosses the bridge, the substory is complete.
RewardAccessory: Encounter Finder
#59Postcard Rookie - Majima
▼
Sotenbori — street ? icon
Trigger: Right after Chapter 8 begins, with 5 or more eligible substories completed
Enter the Sunshine office and a radio cassette starts playing. Majima tries to turn it off but the show 「Dolce Kamiya's Postcard — Dolce」 airs, starting the substory. Substories 59, 60, and 61 are a connected series. Examine the office desk for a postcard to submit to the radio. Whatever radio name you pick, it ends up as 「Goro-Goro-Goro-Jiron」. You write stories based on completed substories. There are 13 types to choose from but only 6 will be selected. Submit a story, step outside, come back in, and check the radio cassette. If your story is selected the substory completes. Otherwise keep submitting winning stories. The final reward comes in substory 61.
■ Winning substories:
Substory 49 - From the Heart ○
Substory 50 - The Entertainer's Throne ✕
Substory 52 - Boyfriend for Hire ○
Substory 53 - The Man Who Changed His Face ✕
Substory 54 - Cult Trap ✕
Substory 55 - Calling the Future ✕
Substory 56 - A Taxing Issue ○
Substory 57 - Crossed Words ○
Substory 58 - Stadium Jumper Strut ✕
Substory 62 - The 10 Million Drug Test ○
Substory 63 - Errands on the Run ✕
Substory 64 - Toilet Talk ○
Substory 65 - The Obatarian Strikes ✕
Reward-
#60Postcard Pro - Majima
▼
Sotenbori — street ? icon
Trigger: After completing substory 59
After completing substory 59, enter the Sunshine office and examine the desk to submit another story. Same method — pick a winning story, submit it, then check the radio cassette to hear if it's selected.
Reward-
#61Postcard Master - Majima
▼
Sotenbori — street ? icon
Trigger: After completing substory 60
After completing substory 60, enter the Sunshine office and examine the desk to submit another story. Same method — select a winning story, submit it, then check the radio cassette.
RewardAccessory: Benkei's Amulet
#62The 10 Million Drug Test
▼
Sotenbori — street ? icon
Trigger: While returning to Majima's apartment in Chapter 3
1.Examine a notice on the wall in the west end of Shofukucho [Map 1] to trigger the substory.
2.Go to Ashitaba Park at [Map 2] and talk to a 「suspicious man」 to sign up for a drug trial. Head to the office for a contract-signing event. Then fight 6 suspicious men across 3 rounds. HP fully recovers between rounds.
■ Drug side effects:
· Round 1: HP and heat gauge drain over time
· Round 2: Fighting style changes randomly
· Round 3: Vision gets worse
For Round 1, use recovery items when HP starts draining. Slugger Style for sweeping attacks works well. In Round 2, you may switch to Dancer Style even if you never learned it — styles change automatically every few seconds. In Round 3 the vision degradation is mild, so don't worry too much.
Reward¥10,000,000
#63Errands on the Run
▼
Sotenbori — street ? icon
Trigger: While returning to Majima's apartment in Chapter 3
1.Try to head from Shofukucho West toward Houjinsha Alley [Map 1] and a substory starts with a 「running man」. Head to M Store Shofukucho and the running man is clutching his leg in pain. Enter the M Store and buy 「Toughness Z」 to give him. Once he recovers he leaves — move away from M Store Shofukucho a bit, then return to find the errand boy again. His sneakers are torn,
2.so go to Don Quijote at [Map 3] and buy 「Sneakers」. Move away from M Store Shofukucho again and return — the errand boy is clutching his leg again. Talk to him. Head to the river on the Sotenbori Street side at [Map 4] to deliver 「Deodorant Sheets」 in his place. After an event with Emi and Tomo, fight and defeat the thugs. Afterward, a choice appears about whether to tell the errand boy the truth — either is fine. After completing the substory, talk to the errand boy at [Map a] to be able to send him on errands. After sending him once, enter a shop or change areas to send him again.
RewardCan now send errand boy on errands
Errand Boy becomes recruitable
#64Toilet Talk
▼
Sotenbori — street ? icon
Trigger: While returning to Majima's apartment in Chapter 3
Head near the bathroom in Ashitaba Park to start the substory. Enter the bathroom and Majima finds what looks like graffiti written by a woman, then writes a reply. Any choice is fine — content barely changes. After writing, enter any shop to change areas, then return to the bathroom. Using the 「Karaoke Snack Kahi」 at [Map a] is convenient. Head to the phone booth at [Map 2] and fight 4 punk fighters. There's one enemy with a stun gun — take that one out first. Win the fight, receive 「Serenity Towel」 and the substory is complete. Note: equipping the Serenity Towel prevents the heat gauge from filling, so it's generally not recommended to equip it.
RewardAccessory: Serenity Towel
Image Video '24 Ito Rina' added to stock
#65The Obatarian Strikes
▼
Sotenbori — street ? icon
Trigger: While returning to Majima's apartment in Chapter 3
Examine the queue at the takoyaki stall at [Map 1] and a 「middle-aged woman」 cuts in line, starting the substory. Any story choice is fine — content only changes slightly. After the first event, move away from the stall a bit then come back for the next event. You receive 「Candy」 in the dialogue. Move away again and return, and a fight with a street ruffian starts. Defeat them to complete the substory.
RewardItem: Candy
Etsuko becomes recruitable
#66Party at Maharaja
▼
Sotenbori — street ? icon
Trigger: While heading to Yaksou Kaikan in Chapter 4; dance at Maharaja 3 or more times
After dancing 3 or more times at Maharaja Sotenbori, step outside and come back in to trigger the substory. Inside the club, a bodycon-dressed woman (Isobe) approaches you and a dance battle begins against Kengo. Win to complete. Easy difficulty is fine. Retry if you lose.
Reward-
#67Disco Transformation
▼
Sotenbori — street ? icon
Trigger: After completing substory 66
After completing substory 66, step outside and back into Maharaja Sotenbori, then head near the bar area to trigger the substory. A dance battle starts with an 「uncle」. Win to complete. Easy difficulty is fine. Retry if you lose.
Reward-
#68Disco Dancing Goddess
▼
Sotenbori — street ? icon
Trigger: After completing substory 67
After completing substory 67, step outside and back into Maharaja Sotenbori to trigger the substory. A dance battle starts with 「Isobe」. Easy difficulty is fine. Retry if you lose. Not as tough as OGITA at Maharaja Kamurocho, but fairly challenging — build up step count as high as possible and input the buttons accurately. Nail your Fever Hits reliably. After winning, you're asked if you like dancing. Answering 「Yes」 may be the better call. Receive the 「Isobe Fan」 and the substory is complete. Each time Majima dances thereafter, the bodycon women around him will hold up the Isobe Fan.
RewardValuables: Isobe Fan
Teacher Isobe becomes recruitable
#69Paternal Instincts
▼
Sotenbori — street ? icon
Trigger: After Yuki's final special training session in Chapter 7
After Yuki's final special training at Sotenbori Cabaret Island, this substory triggers. Two rounds of choices between 「Watch quietly」 and 「Step in」 — either is fine. Choosing 「Watch quietly」 both times completes the substory. Choosing 「Step in」 causes Majima and Yoda to treat the man as a fraud, but they learn he is Yuki's father and the substory still completes. Either choice doesn't affect Yuki's exp gain after completion.
Reward-
#70A Moment Shared
▼
Sotenbori — street ? icon
Trigger: After Chika's final special training session in Chapter 7
After Chika's final special training at Sotenbori Cabaret Island, this substory triggers. On the bridge scene, a choice appears between 「I thought you were necessary for our club」 and 「I felt sorry for you」 — either is fine. Content changes slightly but the reward is the same.
RewardImage Video '01 Arimura Chika' added to stock
#71Of Love and Ramen
▼
Sotenbori — street ? icon
Trigger: After Mana's final special training session in Chapter 7
After Mana's final special training at Sotenbori Cabaret Island, this substory triggers. Mana is surrounded by 2 street thugs on a bridge — defeat them to complete the substory.
RewardImage Video '02 Sakura Mana' added to stock
#72The First Friend
▼
Sotenbori — street ? icon
Trigger: After Ai's final special training session in Chapter 7
After Ai's final special training at Sotenbori Cabaret Island, this substory triggers. Choices between 「I'll just keep working」 and 「I'd consider it if the right woman came along」 appear, but the reward is the same either way and either choice completes the substory. Choosing the second option plays a scene suggesting Ai has feelings for Majima.
RewardImage Video '03 Uehara Ai' added to stock
#73A Little Brotherly Love
▼
Sotenbori — street ? icon
Trigger: After Hibiki's final special training session in Chapter 7
After Hibiki's final special training at Sotenbori Cabaret Island, this substory triggers. A young boy asks to work at Sunshine. In the park, choices appear: 「That would be tough」 or 「I'll protect my big sis」 — either is fine. Either only slightly changes reactions; the reward doesn't change.
RewardImage Video '04 Otsuki Hibiki' added to stock
#74Dream Chaser
▼
Sotenbori — street ? icon
Trigger: After Saki's final special training session in Chapter 7
After Saki's final special training at Sotenbori Cabaret Island, this substory triggers. A scene plays where Saki is surrounded by men and a fight with 2 street thugs starts. Defeat them to complete the substory.
RewardImage Video '05 Hatsumi Saki' added to stock
#75Mystery Caller
▼
Sotenbori — street ? icon
Trigger: While heading to Cabaret Grand in Chapter 7
Approach the phone booth at [Map 1] and it rings, starting the substory. Answer it, receive ¥100,000, and are told to bring a 「9mm Auto Pistol」. Get the pistol via weapon search at Ryuko Hanzen at [Map a]: Japan → Kanto Nagano Nakajo. Bring it to the phone booth location to receive ¥200,000 and complete the substory. ■ To reach 100% bond: After the substory, a bond with 「Simon」 begins. Bring Simon the weapons he requests to raise the bond gauge (you'll receive money as rewards).
Required weapons:
· Blue Dragon Sword: weapon search East Asia → Night Market
· Tourmaline: weapon search West Asia → Indian Noble
· Sakura Fubuki: reward from substory 53 / weapon search Japan → Showa Samurai
After calling Simon, head to [Map b]. Fight 3 suspicious men armed with pistols — Slugger Style sweeps work well. After defeating them, return to the phone booth and go inside. Listen to Simon's story and the bond is achieved. Gold Cast 「Mystery Woman」 is recruited.
Trigger: After talking to Mr. Libido at Teruteru-bouya in Chapter 4
Approach the entrance to Gandhara Sotenbori and a substory triggers with Mr. Libido. Just listen to his story to complete it. ■ To reach 100% bond: Bond gauge rises each time you watch an Image Video at Gandhara. If no events are triggering, increase the number of Image Videos you own. At 80%, Mr. Libido says 「I should take a break sometimes」 and leaves Gandhara. To trigger the next event you likely need about 15 Image Videos. After watching a video at Gandhara and stepping outside, a scene where Mr. Libido is in distress occurs. Buy 「Virility Herb Drink」 at Daikoku Drug at [Map a] for ¥30,000 and give it to him. From that point, the Virility Herb Drink becomes permanently available at Daikoku Drug (fully restores HP and heat gauge). Giving it to Mr. Libido achieves the bond.
Reward■ Bond gauge 100%
Virility Herb Drink becomes available for purchase
#78The Doll Girl
▼
Sotenbori — street ? icon
Trigger: While returning to Majima's apartment in Chapter 3
Pass in front of Hi-Tech Land SEGA for a cutscene of a girl staring at the arcade. Talk to her to trigger the substory. Talking twice gets no response — enter a shop to change areas, then return to find her surrounded by 2 delinquents. A fight starts. Defeat them and the substory is complete. ■ To reach 100% bond: Enter Hi-Tech Land SEGA and play the UFO Catcher (crane game). 「Red Maron」 means the 「Squirrel Maron (Red)」 plush — a squirrel plush with a pink hat. Win it and give it to the girl to raise the bond gauge. To change the crane game's contents, talk to the clerk at the counter. Enter a shop and come back — the girl is at the same spot. This time win and give her 「Squirrel Maron (Blue)」 — a yellow squirrel plush with a light blue hat. Any choice afterward is fine. Change areas and return — she now wants a pink Muni. The pink Muni is the 「Java Sparrow Muni (Pink)」 — a fully pink chick plush with a small yellow-green hat. A little tricky to win, but knock it sideways first then grab it. At 80% bond an event triggers, fight 2 street ruffians and win. Receive thanks and the bond is achieved.
Trigger: While returning to Majima's apartment in Chapter 3
Eat at Komian [Map 1] to trigger the substory. See the dialogue event and the substory is complete. ■ To reach 100% bond: Bond rises each time you eat — order the cheapest item. At 50%, events occur where waitress Nozomi breaks a dish and the owner scolds her. At 80%, enter the restaurant again — an event plays where Nozomi cooks in place of the chef. Receive ¥10,000 and be asked to prepare salmon, soft-shelled turtle, and eel. Fish in the Dotonbori River and hand over the ingredients to receive the 「Trouble Finder」 and achieve the bond. Fishing spots: river fishing at [Map a] and [Map b]. Examine the fishing spot to get the 「Beginner's Fishing Rod」. Buying the 「God of Fishing」 rod at Ebisukuya Sotenbori (¥30M) makes fishing much easier. Salmon and eel are at [Map a] — salmon is fish-shaped in the mid-to-far range; eel is thin and long. Soft-shelled turtle is at [Map b] — it looks like a gourd shape.
Reward■ Bond gauge 100%
Accessory: Trouble Finder
Image Video '14 Hazuki Nozomi' added to stock
Komian partnership available
Fishing Rod: Tsuridaiga
#80STIJL's Barkeep
▼
Sotenbori — street ? icon
Trigger: While returning to Majima's apartment in Chapter 3
Drink at BAR STIJL [Map 1] and the bond gauge rises, triggering the substory. Just listen to the story to complete it. ■ To reach 100% bond: Bond rises each time you drink. If you drink too much you can't drink again until the alcohol clears — buy 「Ryukyu Sake Legend」 at Daikoku Drug at [Map a] to sober up. At 70%, you look after the bar in place of the bartender. A dialogue choice with a customer appears. Correct answers earn a 「French-made Wallet」 from the bartender. After achieving the bond, 「Courvoisier XO」 is added to the menu.
■ Choices:
1) Cherry barrel 2) Sherry barrel 3) Jury barrel
1) Recommend Beefeater 2) Recommend Ballantine's 3) Recommend Valentine
1) It has a fragrant fruity smell 2) It has depth and rich flavor 3) It goes well with dried snacks
Correct answers: 2) → 3) → 1)
Reward■ Bond gauge 100%
French-made Wallet (correct choices)
Courvoisier XO added to stock
STIJL partnership available
#81Gandhara's Clerk
▼
Sotenbori — street ? icon
Trigger: While returning to Majima's apartment in Chapter 3
Watch a video at Gandhara Sotenbori [Map 1] to trigger the substory. Finish talking to the clerk to complete it. ■ To reach 100% bond: Bond only rises by watching Image Videos at Gandhara — watching the same video multiple times counts. At 80%, an event about a rumored video from a woman in white occurs. Head to [Map a] to find the 「White Woman」 — she only says 「I'm cold」, so buy 「Assorted Oden」 at M Store Shofukucho at [Map b] and give it to her. Receive the 「Rumored Video」 then go to Gandhara. Watch the rumored video together with the store manager to achieve the bond.
Reward■ Bond gauge 100%
Gandhara partnership available
#82Kyoko at SEGA HI-TECH LAND
▼
Sotenbori — street ? icon
Trigger: While returning to Majima's apartment in Chapter 3
Play Space Harrier at Hi-Tech Land SEGA [Map 1] to trigger the substory. Just talk to Kyoko to complete it. ■ To reach 100% bond: Bond only rises by playing Space Harrier — score doesn't matter, just complete the game. Quitting before it ends doesn't count. At 30%, an event occurs where Kyoko is playing Space Harrier inside the arcade. You need to beat Kyoko's score of 1,000,000. Retry until you succeed. Getting to just before the Dragon fight is generally enough for 1M. Receive 「High-quality Iron」 after hitting 1M. At 80%, another event with Kyoko playing occurs. This time beat 2,000,000. Getting past the Dragon and up to around the stone face stage is generally enough. After hitting 2M, re-enter Hi-Tech Land SEGA to find 「Fantasy Zone」 added to the arcade. Kyoko's bond is achieved.
RewardMaterial: High-quality Iron
■ Bond gauge 100%
Fantasy Zone added to arcade
Image Video '17 Maki Kyoko' added to stock
Hi-Tech Land Sega Sotenbori partnership available
#95Sparring with Komeki
▼
Sotenbori — street ? icon
Trigger: While heading to Yaksou Kaikan in Chapter 4
Talk to 「Komeki」 at Ashitaba Park to start the substory. Choose from 5 training options — completing any one completes the substory. No matter which you choose, it starts with the top option 「Komeki-ryu Total Arts」. When Komeki's HP drops to half, Majima tries out a new technique mid-battle. Practice hitting Komeki 5 times with a △ attack during a sway with the X button. After the practice, simply defeat Komeki. Komeki's training becomes available afterward.
RewardKomeki's training becomes available
#96Fei Hu's Training
▼
Sotenbori — street ? icon
Trigger: While returning to Majima's apartment in Chapter 3, after completing one weapon search
After completing your first weapon search with Fei Hu at Ryuko Hanzen, re-enter the shop and Fei Hu approaches you, starting the substory. Just listen to Fei Hu's training pitch to complete it.
RewardFei Hu's training becomes available
#97Areshi's Training
▼
Sotenbori — street ? icon
Trigger: While heading to Yaksou Kaikan in Chapter 4
Talk to the Areshi brothers in the back alley of Shofukucho West to trigger the substory. A Breaking Fight starts at Iwao Bridge. For 2 minutes, attack the Areshi brothers using Dancer Style to earn money. When time runs out, receive 20% of what the Breaking Fight earned, and the substory is complete. Afterward, Areshi's training is available in the back alley of Shofukucho West. Attack the Areshi brothers with Dancer Style to earn money.
RewardAreshi's training becomes available
#98Play-Money Shakedown
▼
Sotenbori — street ? icon
Trigger: While heading to Odyssey in Chapter 3, when encountering a roaming thug in Sotenbori
Roaming the field, defeat the money-hungry thug 「Kawahashi Naoya」. Approach Naoya when you encounter him and fight to receive the substory. Defeat him to complete. Tip: use drink items that restore the heat gauge and activate weapon heat actions for an easy win.
Reward-
#99The Ultimate Plan
▼
Sotenbori — street ? icon
Trigger: After completing substory 98, when encountering a roaming thug in Sotenbori
Roaming the field, defeat the money-hungry thug 「Oe Kenji」. Approach Kenji when you encounter him and fight to receive the substory. Defeat him to complete. Tip: use drink items that restore the heat gauge and activate weapon heat actions for an easy win.
Reward-
#02Gandara Senryo North — 'Video Girl' substory
Kamurocho — Senryo St. North
Kiryu side. Watch any image video 3 times, then re-enter the shop.
#03Clerk Affinity 90 → Special Event
Either Gandara branch
Repeated viewings (even the same video) raise affinity. At 90+, the next viewing triggers a cutscene.
#04White-Dressed Woman at Odyssey Warehouse
Sotenbori — Odyssey warehouse
Appears after the special event. Buy 'Oden Assortment' at M-Store Shofukucho and bring it.
#05Special Video — Final Reward
Gandara (replay 'Special Video')
After receiving the 'Special Video', return to Gandara to watch it — completes the side reward + Completion List entry.
RewardCompletion List entry + bond friendship line activated
For a carom, aim to clip the very edge of the target ball so the cue ball glances off into a second ball — mid power hit slightly low adds spin and lands it more reliably.
The easiest combination is to line two object balls straight toward a pocket and push the front one into the back one with the cue ball — build that layout in Solo and farm it in one shot.
If you keep flying off, add weight — Heavy Suspension (Substory #41 reward) plus a Bumper/Side Stabilizer give the best stability-per-cost of any parts.
Tune just enough to place 1st, not for a record — swapping the fewest parts and slightly under-tuning speed for a clean finish is faster overall.
Stepping on a note's own square (or the same square twice) gives no step bonus — you must move to a different square and back to register the +10.
Dancing Fever can be used 3 times per song for a flat 800 pts each — use all three, just avoid triggering it over note-dense sections.
Miss Isobe's score is RNG, swinging from ~6,300 to ~8,700 regardless of your play — if she's 'on fire' you can lose a great run, so just retry rather than grinding a single attempt.
Hold the fire button down (rapid-fire) instead of mashing — its damage output is far higher than manual taps, clearing bases and bosses faster.
Each of the boss's 9 turrets is 1,000 pts and the kill is 10,000 — bank 20k+ per stage and you'll usually hit 100k by stage 5, so save bombs for bosses.
Fantasy Zone easy guide (Director's Cut)Fantasy Zone 100,000 points guide
On a tie you get a mash-off, and the longer it runs the more damage the winner deals — if your health is fine it's often better to throw it quickly to minimize the hit.
Recruiting Jennifer or Momoko (top stats) sharply raises tournament win rates at the cost of lower payouts — Jennifer's attacks are mostly 5-star for the best damage.
Reel so only PART of the red tension line is submerged, not all of it — a fully red line snaps. The Peerless Pole from Ebisu Pawn (30M yen) makes big catches far more stable.
All 15 freshwater fish (Director's Cut)All 18 saltwater fish (Tokyo Pier)
Each rival's special move is tied to one fixed type (rock/paper/scissors) — lose a round to identify it, then keep throwing the hand that beats that type.